My Ignition System wont Work

My Ignition System wont Work

There are three, main, items that will keep the engine from getting a spark. A bad ignition coil, a bad igniter and a bad distributor.

To check the ignition coil, measure the resistance between the +, black/yellow wire, terminal and the -, white/blue wire, terminal of the coil. The resistance should be about 0.6 to 0.8 ohms at 70° F. Then check the resistance between the +, black/yellow wire, terminal and the coil wire terminal. It should be about 12,000 to 19,200 ohms at 70° F. It can also be bench tested out of the car.

As for the igniter, if the tachometer is working, then the igniter is okay. Here is the procedure for checking the igniter.

- Remove the distributor cap, the rotor and the leak cover.

- Disconnect the black/yellow, white/blue, yellow/green and blue wires from the igniter unit.

- Turn the ignition switch ON and check for battery voltage between the black/yellow wire and body ground. If there is no battery voltage, check the black/yellow wire between the ignition switch and the igniter unit. If there is battery voltage proceed to step 4.

- Turn the ignition switch ON and check for battery voltage between the white/blue wire and body ground. If there is no battery voltage check the ignition coil for proper operation or for an open circuit on the white/blue wire between the ignition coil and the igniter unit. If there is battery voltage proceed to step 5.

- Check the yellow/green wire between the PGM-FI ECU and the igniter unit.

- Check the blue wire between the tachometer and the igniter unit.

- If all tests are normal, replace the igniter unit.

How to pull the DTCs and how to interpret the Malfunction Indicator Lamp (MIL) flashes.

How to pull the DTCs and how to interpret the Malfunction Indicator Lamp (MIL) flashes.
Toyota Camry Trouble Codes Procedure

Malfunction Indicator Lamp Check:

The Malfunction Indicator Lamp (MIL) will come ON when the Ignition Switch is turned ON and the engine is not running. HINT: If the MIL does not come ON, proceed to troubleshoot the combination meter circuit.
When the engine is started, the MIL should go OFF.

If the lamp remains ON, the diagnosis system has detected a malfunction in the system.
DTC Extraction In Normal Mode:

Turn ignition switch ON.
Using a jumper wire or SST, connect terminals TE1 and E1 of the Data Link Connector (DLC) 1 or 2.

Data Link Connector 1 Is Mounted Behind The Right Strut Tower

Example; Codes 12 And 31

Read the DTC's from the Malfunction Indicator Lamp (MIL) by counting the number of blinks and pauses.

 When two or more DTC's are present, the lower number code will be displayed first. The example shows codes 12 and 31.
DTC Extraction In Test Mode:

Initial conditions.

Battery positive voltage 11 volts or more.
Throttle valve fully closed.
Transmission in park or neutral position.
Air conditioning switched OFF.
Turn ignition switch OFF.
Using a jumper wire or SST, connect terminals TE2 and E1 of DLC 1 or 2. NOTE: The test mode will not start if terminals TE2 and E1 are connected after the ignition switch is turned ON.
Turn ignition switch ON.

To confirm that the test mode is operating, check that the MIL is flashing when the ignition switch is ON.
If the MIL does not flash, proceed to the TE2 terminal circuit test under the "Diagnostic Charts".
Start the engine.
Simulate the conditions of the malfunction as described by the customer.
After the road test, using a jumper or SST, connect TE1 and E1 of DLC 1 or 2.
Read the DTC on the MIL by counting the number of blinks and pauses. I realize this is not your ideal way to communicate, but it's what they gave you, so roll with it.

When two or more DTC's are present, the lower number code will be displayed first. The example shows codes 12 and 31.
After completing the check, disconnect terminals TE1, TE2 and E1 and turn off the display.​

When vehicle speed is 3 mph or below, DTC 42 (vehicle speed sensor signal) is output, but this is not abnormal.

When the engine is not cranked, DTC 43 (starter signal) is output, but this is not abnormal.
When the automatic transmission shift lever is in the "D", "2", "L" or "R" shift position, or when the air conditioner is ON or when the accelerator pedal is depressed, DTC 51 (switch condition signal) is output, but this is not abnormal.

Adjusting your idle speed Honda Itegra (Gen3)

Adjusting your idle speed Honda Itegra (Gen3) 


The idle is adjusted by a screw on the throttle body, but it requires a few steps to adjust the idle properly. 

First warm up your car to its normal operating temperature, at this point it should be idling at its normal 


spot. Pop your hood and located the idle adjustment screw

.


In this picture the screw is highlighted in yellow and I am pointing to it. This is on the side of the throttle body, right above where the air intake tube connects. 
If your idle has never been adjusted, it is possible that the screw will be covered up with some light rubber substance from the factory. Simply scrape it out with a thin screwdriver or a small knife. Before you start adjusting that screw, you need to disconnect the Idle Air Adjustment valve (IAC). The idle air adjustment valve lets in more air depending on what the sensors tell it, in order to help maintain a constant idle and prevent possible stalling. We want to disconnect it so that we can adjust the idle itself with out any interference. 

The valve is located behind the throttle body, facing the firewall.This is a picture taking looking directly down on the top of the intake manifold


There is an electronic connector on the bottom of the IAC valve, that you need to disconnect. While the car is running, Simply push down on the tab, and pull the connector downward and off of the valve. Be careful not to touch anything in the engine bay that could be hot, you could burn yourself. 


At this point the idle should drop at least 100rpm. If you don't notice a difference in idle, you may have a bad IAC and should replace it. 
Once the IAC has been disconnected you can turn the screw to adjust the idle. Turning the screw towards the firewall, or loosening the screw, will increase the idle speed. Turning the screw away from the firewall, or tightening the screw, will decrease the idle. 

You want the idle to sit right at 650rpm on the tach. Right between the 600 and 700 marks shown below. 


One you have achieved this, turn off the engine. Plug the IAC clip back in, and reset the ECU.

After you have let your ECU adapt, you should idle steady at 750 rpm +/- 50 when warm.


source integra.net

Advanced Ignition Troubleshooting Honda Integra

Advanced Ignition Troubleshooting Honda Integra 

Tools required


- Phillips Screwdriver
- Digital Multi-Meter
- 12-Volt Light Probe
- A friend

Start by removing the 3 rotor cap screws:


Next, we remove the rotor. Do this by first removing the Phillips screw, then wedge a couple of flathead screwdrivers behind and pull.


Next, pull off the dust shield to expose the coil and ICM.


 Test the primary coil by first setting the multi-meter to ohms:


Then measure the resistance between the two screw terminals:


The resistance should fall between 0.6 and 0.8 ohms for the primary coil.

Next is to measure the secondary coil resistance:

 
The resistance should fall between 12.8K and 19.2K ohms for the secondary coil. 
Next we will test the input signal to the ICM

To do this, first PUT THE COIL BACK IN and attach the wires to the screw terminals, then disconnect the BLK/YEL, WHT/BLU, YEL/GRN and BLU spade connectors from the ICM.


Set the multi-meter to Volts DC (VDC)


Now, turn on the ignition to position 2 (don’t start the car) and measure the following:
- Between BLK/YEL and GND, there should be +12V
- Between WHT/BLU and GND, there should be +12V


Finally we test the ICM (Igniter module).

Before testing, reconnect the wires to the ICM that you removed while testing the input signal. 
To test the ICM, take the 12V light probe and attach the alligator clip to the positive battery terminal:


Now, put the probe tip into the negative coil screw and have a friend crank the engine:


Removing the Coil and ICM


If none of these tests fail and you are certain you still do not have spark, it is possible that the coil is internally grounded. To test for this, Place one meter probe on one terminal and the other to a chassis ground. Test the second terminal as well. You should NOT get a reading. The meter should stay peaked and say 0L or indicate that the resistance is above its measurement ability.

source : integra.net

Clean an Idle Air Control Valve ( IACV ) in a Honda Accord

Clean an Idle Air Control Valve in a Honda Accord

Image result for iacv honda accord

Idle air control valve (IACV), Car's idle depending on the amount of air that is entering the engine. The car's computer takes readings of idle control adjustments and regulates the car's rpm accordingly. Therefore, if the idle air control valve is not functioning properly, you will notice that your car is revving or idling irregularly. A high, fluctuating or erratic idle, or an idle that stalls out sporadically, is a sign that you may need to clean the idle air control valve. You do not need to be a mechanic in order to clean the IACV, but you will need some familiarity with the car parts under your hood. If you drive a Honda accord and your idle control is acting up, you will find that the IACV is readily accessible for ease of maintenance.

The step to clean idle air control valve are

Purchase a new IACV gasket. You will need to replace the old one on your Honda IACV before returning it back to its place under the hood.

Locate the IACV. You will find it at the back center of the under hood area, near the throttle body (TB) and mounted on the rear of the intake manifold (IM). You will have to remove the TB intake hose in order to gain access to area of the IM that is connected to the IACV.

Remove the Honda idle air control valve.
Unscrew the bolts attaching the IACV to the intake manifold. You will have to feel around for the lower bolt, which will be just out of plain sight.
Pull out the gray plug from the right side of the Honda IACV.
Remove the blue plug from the throttle body.
Locate the coolant hose that attaches the IACV to the TB.
Use needle-nose pliers to pull back the clamp that holds the coolant hose in place and then pull the hose out. This will provide enough slack to pull the Honda idle air control valve to the front so you can completely remove it.
Detach the last 2 hoses from the IACV in order to free it for cleaning.

Remove the gasket from the Honda IACV and throw it away.

Examine the valve so as to identify the carbon build up that must be cleaned out. Note the areas with the heaviest concentration of filth, as you will need to pay special attention to them during the cleaning.

Clean the Honda idle air control valve. Spray the valve with the carb cleaner, being sure to thoroughly saturate the heavy buildup.

Allow the IACV to dry completely.

Put the new gasket in its place.

Reinstall the IACV going backwards through the uninstall process and Adjust the idle control to its ideal setting.

Car Won't Start

Car Won't Start

Most people don’t keep a set of mechanic’s tools in their trunk. So when you get stranded with a dead engine, you feel pretty helpless. But don’t give up right away. We’ve compiled a list of tricks you can try, and none of them require tools. They’re arranged by symptom, and you’ve got nothing to lose by trying them. Of course, they won’t fix the root problem, but one of them just might get the engine started so you can head to the nearest mechanic to have the problem fixed.

Symptom: Starter goes click

This can be caused by a weak battery, dirty battery terminals, a worn starter motor or a stuck solenoid. Here are a few tricks to try:

Cycle the key
Turn on the dome light and watch it while you try to start the engine. If the light goes out, it’s a sign the battery is really weak—almost dead. To heat up the battery, terminals and starter, try the “key cycling” trick (photo 1). But if the dome light stayed bright when you turned the key, move on to the next trick.

Tap on the battery terminals
There’s no way to clean corroded battery terminals when you’re stranded without tools. But you can try to move or at least jar the terminals enough to make better contact (photo 2).

Smack the starter
If you have access to the starter motor, try smacking it with the tire iron from your car jack. Sometimes, the electrical contacts get stuck and can be freed by tapping on them.


Symptom: No click when you turn the key

Shift the Shifter
With your foot on the brake, move the shift lever to the neutral position and try starting the engine. If that doesn’t work, move it back to “Park” and try it again. Moving the shifter sometimes reestablishes electrical contact inside the transmission range selector (also known as the neutral safety switch).

Symptom: Engine cranks but won't fire up

Swap relays
With the radio off, turn the key to the “Run” position and listen for a two-second buzzing sound. That’s the fuel pump priming the injection system. If you don’t hear any sound, the fuel pump relay may be bad or the pump may be on its last legs. First, find the location of the fuel pump relay in your owner’s manual or on the legend of the under-hood fuse box cover. Then locate another relay with the same part number and swap it with the fuel pump (photo 3). Try starting the engine afterward. If it still won’t fire, beat on the fuel tank with your shoe to jar the fuel pump motor (photo 4).

Unflood a flooded engine
If you smell gas, the engine is flooded. Press the accelerator pedal to the floor and hold it there while you crank the engine.

Trick the computer

A vacuum leak or funky temperature sensor can result in an air/ fuel mixture that’s too lean to start a cold engine. If you’ve tried all the other tricks shown here and it still won’t start, press the accelerator halfway and try to start the engine. That’ll tell the computer to add more fuel.

How to Change Oil in a Car

How to Change Oil in a Car

1. Warm Engine and Park on Level Surface
After you have collected all of the tools and supplies you need to prepare your vehicle.

How to change oil: The first thing you should do is start the car and let it run for one to two minutes (longer if the weather is cool). This will warm the oil and the engine and that will allow more of the oil to drain out. Just don't run the engine too long - You don't want to be scalded trying to oil out of the engine.

After the engine is warm, find a flat surface to park on (preferably a driveway or pavement). Then put the car in park and block the tires. It is important to block both the front side and back side of the tires with wheel chocks (a wooden block will do too - see image below) to make sure that the vehicle does not roll when jacking it up.

2. Jack up Car and Insert Jack Stands
Check your auto repair manual to find the best location for the floor jack and the jack stands. Most cars and trucks have markings (usually arrows) on the sides under the body of the vehicle that show where to place jacks and jack stands.

I prefer to jack the vehicle from the center under the engine, then place the jack stands on the sides. The photo below shows where I jack the vehicle up most of the time:

The next two photos show some common locations for jacking and jack stands. After the jack stands are in place jack the vehicle up enough so that you can fit underneath to loosen the drain plug and replace the oil filter.

After the jack stands are placed I lower the vehicle onto the jack stands. This creates much more stability than with a jack alone. Sometimes I leave the jack under the engine too, just as a safeguard against the jackstands failing.

3. Locate Oil Drain Plug and Oil Filter
How to change oil: Next you will need to locate the oil filter and oil drain plug. You should be able to find the locations in your owner's manual.

The oil filter is usually located in the hardest possible place to reach...just kidding! It is usually on the side of the engine about halfway up. Sometimes it takes a lot of looking to find it. You might need to look from the top of the engine to see it.

The oil drain plug is located on the bottom of the engine at the lowest point of the oil pan. Sometimes you will need to take off a skid plate or some type of plastic underbelly to get to both the oil filter and the oil pan drain plug. This picture will show you what you are looking for.

4. Remove Drain Plug and Drain Oil from Car
After you have found the oil filter and drain plug, the next step in this how to change oil guide is to find the right sized socket, then loosen the drain plug with a socket wrench.

The point of loosening the drain plug first is that it is much easier to do without the bulky drain pan in the way. Once it is loose you should put on work gloves to protect your hands, position an oil drain pan under the engine then remove the plug the rest of the way.


Be sure to place the drain pan back further than you think it needs to be because the oil will likely shoot out about four to six inches from the drain hole.

Always be sure to have a good way to store the used engine oil. The best way to do this is to have a dedicated gas can that is made for this purpose. If you use old milk jugs you will have a mess on your hands and in your car when you try to transport the jugs.

When the gas can gets close to being full you can take it to most any auto parts store and they will empty it for free.

How to Change Oil Filter in a Car

How to Change Oil Filter in a Car

While there are many guides on how to change oil filter for a car, mine will focus on the easiest methods and best practices, including what are the common mistakes to avoid. To save time avoid frustrations,

Tools Needed to Change Oil Filter
Before performing an oil filter change, you will need to jack up your vehicle, place it on jack stands and drain out the motor oil. Here is full list of tools required for an oil change and oil filter replacement:

1. Remove Oil Filter
How to change oil filter: Now that you have everything you need and the car is jacked up enough for you to crawl under it you need to try to loosen the oil filter by hand.

Don't put the drain pan under the car yet. It is big and bulky and just gets in the way. You will most likely need to try different positions in order to get the best torque (twisting force) on the oil filter. Be sure to wear work gloves when you are trying to loosen the filter. These types of gloves will give you extra grip on the filter and they will protect your hands from used oil.

If you cannot get it to loosen then you will need to use a strap wrench. If there isn't enough room for that then you have to resort to oil filter pliers - This is a special tool that will adjust to the diameter of your oil filter and and create a vice-like grip. These work great to loosen very tight oil filters.

2. Drain Oil Filter
After you break it loose, be sure to put the oil drain pan under it before you loosen it any more. After you get the oil drain pan under the oil filter then you can go ahead and loosen it the rest of the way. It is important to have gloves on and to be in a position in which the oil won't run all the way down your arm.

As soon as you get the oil filter off, just take it and put it face down in the drain pan. Look at the mounting surface where the oil filter attaches to the engine. Be sure that the gasket from the old filter is not stuck to it and if it is then remove it. It's also a good idea to clean this surface.

After you move the drain pan out from under the car you will need to tip the oil filter up on its side so all of the oil can drain out. Let the filter drain for 24 hours, then you can throw it in your household trash.

3. Lubricate Oil Filter Gasket
Unpack your new oil filter and use some fresh motor oil to lubricate the gasket on the new oil filter. This will help to ensure a tight and leak-free fit on the engine. If the filter sits straight up and down on the engine, it's a good idea to pre-fill the filter with motor oil too.

The reason for this is because when you first start the engine after the oil filter change there will be virtually no lubrication because the oil pump will have to fill the filter with oil first. If it is already full then you will get lubrication to your engine much sooner.

4. Change Oil Filter
So far you have removed the oil filter, checked that the oil filter sealing surface on the engine is clean and oiled the oil filter gasket on the new one. Now it's time to get yourself into position to put the new filter back on.

At this stage of replacing an oil filter, it is crucial that you keep the top of the oil filter covered as much as possible while lifting it into position. You can do a lot of damage to the engine if dirt or other debris gets into the oil filter.

Once you get it into position start turning it to tighten. Be sure to not put too much pressure on it while you are getting it started. If you put too much pressure on it while turning it you can end up getting it cross-threaded and that would ruin your whole day. This can be an expensive fix.

Tips or Tricks for keeping your car clean?

Tips or Tricks for keeping your car clean?


Image result for clean car

1. Store them in a climate controlled garage with no direct sunlight

2. Hand wash using a clean microfibre cloth and car wash liquid (turtlewax is my current)

3. Wax with a heavy wax periodically depending on use

4. Use a duster to dust off between washings (a light cover would work too)

5. I don't use much else; no tire shine, no armorall, nothing in the interior 'cept a damp microfibre.....may look into a leather conditioner for this car.

Common Problem on 2001 Honda CRV

Common Problem on 2001 Honda CRV
Image result for honda crv 2001

Owner 2001 Honda CRV with this problem you have done or tried to do to repair your car?
Also if you got it repaired how many different conclusion to this problem have you had. I need as much information as possible. I am trying to fight American Honda to acknowledge this "known problem" and maybe help others with it as well.

I own a 2001 Honda CRV and I have had service and/or requested service for this stalling, rough idle, and cold start problem atleast 7 times. This last time I took it in the dealership told me I have low compression in cylinder #3. They said they had to send it to the their machine shop.

Just to start it would cost me $1000 and then it was going to be more when they verified the problem. They thought it was a burnt valve and the heads would have to be replaced.
I was sickened when I heard this. Especially since I have been having this same issue since I bought the car, and everytime I took it in they said don't worry just have a full tune up done for $600 and it will go away. And it did for a while til the next $600 tune up came and another.
Now, they can't cover up their valve problem anymore cause it's shot. After paying all that money all ready I have to pay well over $1000 more because it wasn't addressed when it started at 16,000 miles.

I just recently found a Technical service Bulletin regarding this exact problem. It is TSB #03038. So, I decided to call American Honda Manufacturer and I have never had so much run around in my life, but I knew that it was going to be a fight. The full TSB states at the end Valve recedes into head. REPLACE cylinder heads. I have a case open and I will know more details in a day or two. I have found 3 different people state that they got their repair done under a goodwill warranty and paid nothing.


Anybody with this problem please let me know about it. I want all the ammo I can fire at them because I know there are a lot of us out there with this problem. I will keep everyone updated and maybe it will lead to a fix for your car as well.

How To Replace 2014/15 Outside Mirror Shells

How To Replace 2014/15 Outside Mirror Shells On A 2014-15 Honda Accord

Replacing The Shell On A 2014-15 Honda Accord
Image result for 2014/15 Outside Mirror Shells On A 2014-15

I had broken the front part of the shell on my new 2015 Accord passenger side mirror backing out of the garage. It may as well have been a side swipe or vandals, either way it needed to be repaired. Going to the dealer was out of the question due to cost.

First move the mirror glass all the way into the up position. Honda did not leave any room to work here, things are really tight. It’s also dark in there behind the mirror so it’s hard to see. I used a small piece of paint stirring stick to help lever the bottom corners of the mirror up so I could get a long small sized flat blade screw driver in behind the mirror.

What you need to do is, get the blade of the screw driver into the little slots and twist, the bottom of the glass should unlock allowing you to lift the mirror glass off.

There are two leads attached to the mirror for the defrost feature. DO NOT Pull the wires!! There is a small tab on the clip holding the wires onto the mirror. Just like any other electrical connector on a car. Push the little tab then while holding the bottom of the connector and mirror gently pull the wire off.

Now you can get to the tabs, clips and screws to disassemble the mirror. You will need the flat blade screw driver and a Torx screw driver.

To remove the front of the shell you’ll need to remove two Torx Screws on the right side and gently pry up on the 3 tabs along the top, and Unlock the main tabs holding the front shell on. One of the main tabs is seen to the left of the motor assembly and the other is at about the 4 o’clock position. These are difficult to unlatch, be sure to remove the screws first then undo the three tabs along the top before unlocking the main tabs.

Lift the front half of the shell up and off exposing the rest of the core with the motor attached. Disconnect the lane change camera lead. The motor is held in place by three Torx screws and two clips.

Remove the three Torx Screws, and gently pry the tabs to release the motor.

At this point there are three screws and a locking tab left to be able to remove the rear cover.

When you have the screws out and the locking tab unhooked, you can pull the rear half of the shell off. Unplug the wire harness from the turn signal assembly. The shell will have the turn signal piece mounted inside so you’ll need to pull two more screws to remove it.

This completes the dis-assembly of the mirror. You can now replace one or both shells or the camera or turn signal assembly. There is a small cover on the bottom . There is no need to remove this cover. You must have the mirror off the car to slide it out, DO NOT attempt to pry it off.

There is also a small trap door on the bottom of the front shell half, this also does not come off.

Now what you have as a pile of parts to work with plus your shell halves.

To reassemble, start by installing the turn signal light assembly. Align the locating pin into its hole and the assembly should slip down into the locators mounded into the shell.

At this time only install TWO screws!

Now you can attach the rear shell to the motor mount assembly. First, make the harness connection to the turn signal assembly.

Next you will need to align the locking clip to its hole in the motor base assembly.

At this time install two more screws only. One on the far left top and one at the bottom just below the motor mounting area next to the turn signal light assembly locating pin.

Now you can mount the motor assembly. There are two tabs and three screws that hold it on. The locking tabs are on the motor assembly.

Clip the motor assembly into the slots and secure with three screws.

This is all we can do with the rear shell right now. Go to your front shell, and install the camera with the two screws and secure the lead into the tabs along the edge.

Connect the cameras wire lead to the harness in the rear shell. Tuck the harness under the hooks molded into the rear shell.

Next mount the front half of the shell. Align the two large tabs with their respective holes in the main frame assembly.

Note the upper tabs are aligned with their small hooks inside the rear shell, and the two main locking hooks are aligned in their slots. Press the front half into the rear half making sure the two large locking tabs click and the three small tabs along the top lock into place.

Install the last two screws on the right side.

Almost done. Lay the mirror glass face down.

Carefully connect the two defrost wire leads until they snap into place.

Position the mirror over the motor and push it until it snaps on. 

When Car need tune up

When Car need tune up

When are that might make you think you need a tune-up?


Image result for tune up

* A dirty or clogged engine air filter is more likely to reduce acceleration than fuel economy, according to tests conducted by the EPA. Because filters get dirty gradually over time, you might not notice a small but steady loss of performance until your car is accelerating like a turtle. But if you haven’t changed the filter in a couple of years (or sooner in areas that have a lot of soot in the air), that could be part of the problem.

* A misfiring engine (when spark plugs ignite at the wrong time) could be caused by worn or fouled spark plugs. Bad spark plugs can also cause low fuel economy, hard starting and sluggish acceleration. Most plugs, though, should last 100,000 miles or more, and engine computers do a remarkable job of compensating for worn plugs, so that might not be the main or only culprit.

* Engine deposits caused by low-quality or contaminated gasoline create drivability problems, and the cure for that might be a fuel system cleaning, either by a repair shop or with a gas-tank additive.

* An old oxygen sensor (say, 90,000 miles or more) may still work well enough that it doesn’t trigger the check engine light but could still hurt fuel economy. Engine performance can also be reduced by more serious internal problems, such as valves that don’t seat properly or worn piston rings, or by restrictions in the exhaust system

* An illuminated check engine light signals when something is amiss in the emissions control system, but depending on what the issue is it could also affect fuel economy or engine performance, so don’t ignore it. A faulty oxygen sensor, for example, leaves the engine computer in the dark about how to set the air-fuel mixture, and that can result in poor fuel economy.

How often should I replace my air filter?


Image result for cabin air filter

Cars mostly have a cabin air filter that catches dirt, debris and some allergens in the air that goes through the heating, ventilation and air-conditioning systems. Cabin air filters need periodicly changing, but not more frequently than engine air filters.


How often should I replace my air filter?
Many manufacturers recommend every two years but say it should happen more often if most of your driving is done in an urban area with heavy traffic and poor air quality, or if you drive in frequently dusty conditions. Air filters aren't that expensive, so replacing them annually shouldn't break the bank.

How do I know when it's time to replace my air filter?
You should change your air filter when it gets dirty enough to restrict airflow to the engine, which reduces acceleration. When that will happen depends on where and how much you drive, but you (or your mechanic) should check the engine air filter at least once per year. If you frequently drive in an urban area or in dusty conditions, you'll probably need to change it more often than if you live in the country, where the air is typically cleaner and fresher.

Why do I need to change my air filter?
The filter cleans the air that goes into the engine, catching particles that could damage internal engine parts. Over time the filter will get dirty or clogged and restrict air flow. A dirty filter that restricts air flow will slow acceleration because the engine isn't getting enough air. EPA tests concluded that a clogged filter will hurt acceleration more than it hurts fuel economy.

When timing Belt shoul I replace


How often should I replace my timing belt?
The schedule for replacing a timing belt varies by manufacturer, with some saying it should be every 60,000 miles and others 100,000 miles or more. Changing the timing belt requires removing many other parts, adding to labor costs. If the timing belt drives the water pump, many mechanics recommend replacing the pump at the same time.

How do I know it's time to replace my timing belt?
A loose or worn belt will cause ticking or rattling noises, poor engine performance and overheating, usually triggering the check engine light. If the timing belt breaks, the engine can't run -- and on some engines that break can cause internal damage. Most engines have timing chains, which typically don't require replacing.

Why do I need to change my timing belt?
It's not a question of why, but a question of how often, based on the recommendations of the vehicle manufacturer or a mechanic who finds the belt is stretched or damaged. See above for mileage recommendations, but remember: If it's broken, you're engine simply won't work.

When Should the Oxygen Sensor Be Replaced?

When Should the Oxygen Sensor Be Replaced?


Oxygen sensors are a important component of the fuel and emissions systems because they control the amount of oxygen in the exhaust and transmit that information to the ECU (elctronic Control Unit ) /engine computer, which adjusts the air-fuel mixture accordingly. If an oxygen sensor fails, the engine computer won't be able to correctly set the air-fuel mixture, which could result in lower fuel economy, higher emissions and damage to other components, such as an overheated catalytic converter.

No vehicle that we're aware of has a warning light that signals when an oxygen sensor has failed, so you have to rely on other vital signs to alert you when there is a problem, such as the check-engine light on the dashboard illuminating.

An illuminated check-engine light could be a sign of a more serious issue, such as with the catalytic converter, or something as minor as a loose gas cap, so further investigation is always required. Any repair shop should be able to read what triggered your check-engine light, and many auto parts stores perform this service for free.

Other symptoms of a bad oxygen sensor include a rough idle, misfiring spark plugs, lack of power, stalling or a significant increase in fuel consumption. Those symptoms could also be indications of other problems, but the EPA says that replacing a bad oxygen sensor can improve fuel economy by as much as 40 percent, so clearly that is one place to look if your vehicle develops a greater thirst for gas.


How to add compressor oil to compressor in Toyota?

How to add compressor oil to compressor in Toyota?


Q:  I have some question want to know, that is I replaced the evaporator , valve and receiver dryer on my Toyota corolla, when I saw the repair manual said, before vaccum the ac system, "add compressor oil to compressor". Can anyone tell me how to fill the ND-8/PAG 46 oil to compressor?

A:


Q : If I replaced the evaporator coil, condenser, receiver dryer, and follow the repair manual instruction to add total 100cc into compressor, is it too much oil?
evaporator 40cc oil  
condenser 40cc oil
receiver dryer 20cc oil


Athere is two method

1. Remove a bolt on compressor and add oil
2.Remove a cover of compressor and add oil
3.Used A/C machine to add oil


Toyota Approves Use of 0W-20 and 5W-20 GF-4 Oils

Toyota Approves Use of 0W-20 and 5W-20 GF-4 Oils

Toyota has approved the use of 5W20 GF-4 oils (e.g., Mobil1) in most modern engines, and 0W-20 in 2AZ-FE engines as shown in the folowing TSB.

I have been using the 5W-20 oil in my 5VZ-FE 4Runner engine for about 6 months now and can see the difference in mileage.


It doesn't appear that either of these oils are approved for the 22R, 3S-FE or 5S-FE engine. I have been using a 50:50 mix of the 5W-20 and 5W-30 Mobil1 in my '96 5S-FE Camry for about 8k miles without any noticable problems. I have also notices a marked increase in mileage in this engine. I have been getting 410 miles/tank (about 27 mpg with 75:25 highway:city). I used to get around 360-375 miles per tank.

Can you Jump start a car with a dead alternator?

Can you Jump start a car with a dead alternator?


Q: I have a 2005 Mazda 6 my alternator died yesterday and i need a replacement. Since the alternator is dead it didn't charge the battery so it dead overnight. now my car wont start here when I'm have a bit of confusion i need to get my car running so i can drive it to my friends garage to replace the alternator. will jump starting a car keep it running long enough to get it to the garage or will i need to fully recharge the battery to get it running? I'm nervous about jump starting the car because the alternative won't be recharging the battery so my car might die before i get there


A: Put the jumper cables on the car- have the donor car running and walk away for 30 minutes-- this will charge your battery and you can start your car and drive it up 30 miles--- charge it for 20 minutes will get you 20 miles-- yes you will be running off your battery, but you can drive it to be repaired. I do this all the time-- sometimes I just sit a battery inside the car- run jumpers out to the dead battery and drive the car to where it needs to be...

Stop Changing Your Oil

Stop Changing Your Oil

Oil chemistry and engine technology have evolved tremendously in recent years, but you'd never know it from the quick-change behavior of American car owners. Driven by an outdated 3,000-mile oil change commandment, they are unnecessarily spending millions of dollars and spilling an ocean of contaminated waste oil.

Although the average car's oil change interval is around 7,800 miles — and as high as 20,000 miles in some cars — this wasteful cycle continues largely because the automotive service industry, while fully aware of the technological advances, continues to preach the 3,000-mile gospel as a way to keep the service bays busy. As a result, even the most cautious owners are dumping their engine oil twice as often as their service manuals recommend.

After interviews with oil experts, mechanics and automakers, one thing is clear: The 3,000-mile oil change is a myth that should be laid to rest. Failing to heed the service interval in your owner's manual wastes oil and money, while compounding the environmental impact of illicit waste-oil dumping.

Scared Into Needless Service
Part of the blame for this over-servicing lies in our insecurities about increasingly complicated engines that are all but inaccessible to the average driver. Pop open the hood of a modern car, and a mass of plastic covers wall off the engine. On some vehicles, the only thing an owner can easily access is the oil cap.

"Vehicles are so sophisticated that oil is one of the last things that customers can have a direct influence over," said Matt Snider, project engineer in GM's Fuels and Lubricants Group. "There's maybe some feeling that they're taking care of their vehicle if they change their oil more often."

The 3,000-mile myth is also promoted by the quick lube industry's "convenient reminder" windshield sticker. It is a surprisingly effective tool that prompts us to continue following a dictate that our fathers (or grandfathers) drummed into our heads: It's your duty to change your oil every 3,000 miles — or your car will pay the price. But as former service advisor David Langness put it, the 3,000-mile oil change is "a marketing tactic that dealers use to get you into the service bay on a regular basis. Unless you go to the drag strip on weekends, you don't need it."

Because busy car owners seldom read their owner's manuals, most have no idea of the actual oil change interval for their cars. And so they blindly follow the windshield reminder sticker, whether it's an accurate indicator of the need for an oil change or not. "I just go by the sticker in the windshield," one well-to-do, educated Denver Lexus owner said. "Otherwise, how would I know when to change it?"

A career Navy mechanic who bought an Edmunds.com long-term car just shrugged when he was told that the vehicle had safely gone 13,000 miles between oil changes. "I'll just keep changing the oil every 5,000 miles," he said. "It's worked well for me in the past."

Our oil change addiction also comes from the erroneous argument that nearly all cars should be serviced under the "severe" schedule found in the owner's manual. In fact, a quiz on the Web site maintained by Jiffy Lube International Inc. (owned by petrochemical giant Shell Oil Company) recommends the severe maintenance schedule for virtually every kind of driving pattern.

The argument that most people drive under severe conditions is losing its footing, however. A number of automakers, including Ford and GM, have contacted Edmunds data editors to request that the maintenance section of Edmunds' site substitute the normal maintenance schedule for the severe schedule that had been displayed.

About the only ones that really need a 3,000-mile oil change are the quick-lube outlets and dealership service departments. In their internal industry communications, they're frank about how oil changes bring in customers. "Many people...know when to have their oil changed but don't pay that much attention to it," said an article in the National Oil and Lube News online newsletter. "Take advantage of that by using a window sticker system [and] customers will be making their way back to you in a few short months."

Another National Oil and Lube News article tied the frequency of oil changes to success in pushing related products and services. For a midsize SUV, the stepped-up oil change intervals will bring in $1,800 over the life of the car, the article says. "A few extra services [or oil changes] can go a long way toward increasing the amount of money a customer will spend during the lifespan we estimated here," the article concludes.

Today's Oil Goes the Distance

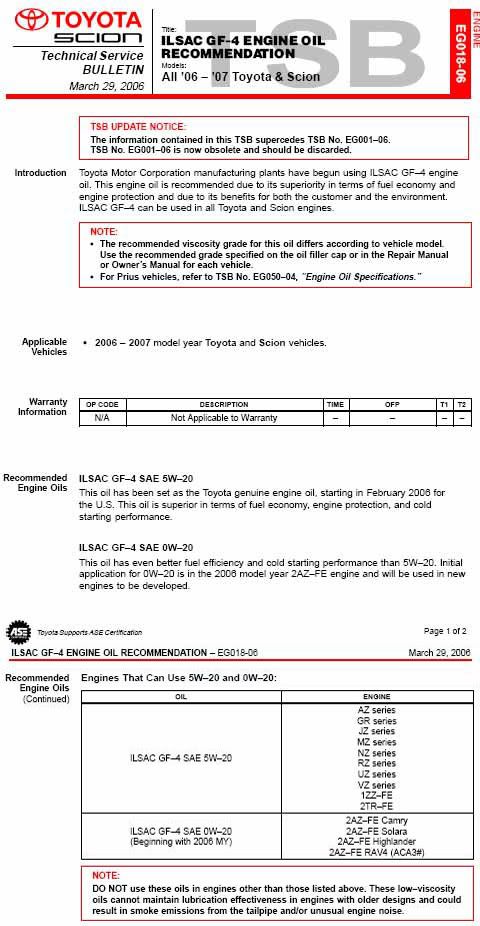
While the car-servicing industry is clear about its reasons for believing in the 3,000-mile oil change, customers cling to it only because they're largely unaware of advances in automotive technology. Among 2010 models, the average recommended oil change interval, based on a normal service schedule, is about 7,800 miles — more than double the traditional 3,000-mile interval. The longest oil change interval is 20,000 miles, for all Porsches. The shortest oil change interval is 5,000 miles in some late-model Toyotas, but the carmaker has begun shifting its fleet to 10,000-mile oil change intervals using synthetic oil.

"Oil has changed quite a bit and most of that isn't transparent to the average consuming public," said Robert Sutherland, principal scientist at Pennzoil Passenger Car Engine Lubricants. Synthetic oils, such as the popular Mobil 1, are stretching oil change intervals, leaving the 3,000-mile mark in the dust. "The great majority of new vehicles today have a recommended oil change interval greater than 3,000 miles," said Mobil spokeswoman Kristen A. Hellmer. The company's most advanced synthetic product (Mobil 1 Extended Performance) is guaranteed for 15,000 miles.

Today's longer oil change intervals are due to:

Improved "robustness" of today's oils, with their ability to protect engines from wear and heat and still deliver good fuel economy with low emissions
Tighter tolerances (the gap between metal moving parts) of modern engines
The introduction of oil life monitoring systems, which notify the driver when an oil change is required and are based on the way the car is driven and the conditions it encounters

For 2010 vehicles, 14 of 35 carmakers are now using oil life monitoring systems. One GM car driven by Edmunds went 13,000 miles before the monitoring system indicated the need for an oil change. We sent a sample of that oil to a lab for analysis. The results showed the oil could have safely delivered at least another 2,000 miles of service.

Oil experts and car manufacturers are solidly on the side of the less-frequent oil changes that these formulation changes make possible. "If customers always just stayed with the 3,000-mile recommendation, there'd be these great strides in the robustness of oil that oil companies have made [that] wouldn't be utilized," said GM's Matt Snider. Consumers, he said, would be "throwing away good oil."

Chris Risdon, a product education specialist for Toyota agreed, adding that oil technology advances that permit fewer changes are a tool to protect the environment. "If you're doing it half as much, that's 5 quarts of oil times 1.7 million vehicles a year — that's a tremendous amount of waste oil that's not being circulated into the environment."

Waste oil is a problem exacerbated by too-frequent oil changes, according to the California Integrated Waste Management Board, which has campaigned against the 3,000-mile dictate. The agency says that 153.5 million gallons of used oil is generated in California annually, but only 59 percent of it is recycled.

Our Fit Gets Taken for a Ride
To see what might happen to the average car owner, we took a 2007 Honda Fit to Jiffy Lube for an oil change. The car has an oil life monitoring system, and the system has recommended the past two oil change intervals at 5,500 miles and 7,600 miles on non-synthetic oil. In both cases, an engine oil analysis revealed that the oil could have provided at least another 2,000 miles of service.

On this occasion, we told the Jiffy Lube service advisor we were considering synthetic Mobil 1 because we heard it could extend our oil change intervals. The service advisor said the synthetic oil could enable the Fit to go 4,000 or 5,000 miles before the oil "burned out." The Mobil 1 oil change had a price tag of $92.39. The technician also took the opportunity to upsell us, recommending a cabin air filter for $49.99. The total for our visit, after a $15 coupon, was $132.72.

When the car was returned to us, the sticker in the window called for an oil change in 3,000 miles, not the 4,000 or 5,000 miles the service advisor had promised.

If we were foolish enough to follow Jiffy Lube's 3,000-mile change schedule (which is essentially the advice given by all quick oil change outlets and dealership service departments), the Fit would undergo four unnecessary oil changes per year (assuming 15,000 miles per year of driving), wasting $369 and 15.2 quarts of perfectly good oil. Over five years of the car's life and 60,000 miles of driving, this would amount to $1,847 and 125 quarts of wasted oil. This does not include other "upselling" items at each visit, such as cabin air filters.

Defending the 3,000-Mile Interval
The quick oil change industry justifies its perpetuation of the 3,000-mile standard by saying that most people drive under "severe" conditions. Jiffy Lube's quiz, mentioned earlier in this article, is one example of how that notion is reinforced in drivers' minds. An oil change company representative said the 3,000-mile recommendation is meant to be just that — a recommendation.

Scott Cudini, innovations manager for Jiffy Lube, repeatedly called the 3,000-mile interval a good "fallback position," meant to be a guideline but not a hard-and-fast rule. He added that Jiffy Lube technicians would initiate a "dialogue" with customers about the oil change intervals that apply specifically to their cars.

"In most cases," Cudini said, "even if customers' cars have been plastered with that 3,000-mile sticker, they may have been told by the service advisor that, 'By the way, Sir/Madam, your interval is 5,500 miles.'" Based on our experience at Jiffy Lube and other quick-change outlets, technicians rarely initiate dialogues that could provide accurate information about oil change intervals. In fact, according to a Jiffy Lube spokesperson, the system for supplying technicians with answers only gives them information from a vehicle's severe schedule.

The quick-change industry's deep fallback argument in favor of frequent oil changes is that they are a hedge against trouble. You can't hurt your engine by changing your oil too often, so doesn't that imply that it might actually help it? Well, no.

Steve Mazor, manager of American Automobile Association's Research Center, said that more-frequent-than-necessary oil changes will not "gain any additional life for your engine or any improved fuel economy." He added, "In reality it will make little or no difference to the performance of the vehicle."

The Right Time To Change Your Oil

So where does this leave the car owner who was raised on the perceived wisdom of the 3,000-mile oil change? For a full discussion, your next stop should be our related article, "When Should You Change Your Oil?," which will save you hundreds of dollars over the next few years and fully protect your car and its warranty, while limiting the use of a natural resource.

The short answer, meanwhile, is to consult your service manual or Edmunds' maintenance section to learn your car's actual oil change schedule. If your car has an oil life monitoring system, don't try to second-guess it. Understand how it works and follow its guidelines. To probe more deeply into this subject, consider sending a sample of the oil from your next oil change to a lab such as Blackstone Laboratories, for an inexpensive analysis. Our last suggestion? Rip that sticker off your windshield.