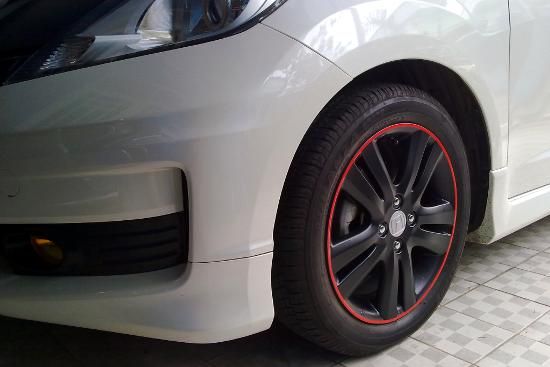
I love those rims like Volk Rays TE37 especially the Time Attack version. But ugh, the price is too high for me, around 20mil IDR. I almost buy their replicas, for not so expensive price about 3.6 - 3.8mil IDR. But hey! It will stretch my OEM tire which has max width 6.5 inch. The rims need 7 inch so my tires will be like donuts: thinner and pretty not save for a log ride, especially for touring. I don't have any budget to buy matching tires, so for now: bye bye TE37... sigh...
Now what? To have nice black rims I have another two options: paint them or wrap them with stickers. But for painting their original coating need to be removed! Oh no! they're slighty brand new rims! So, stickers! So here I have 5 rims shown like this:
My tools & materials, and the finished result. It's not my best wrap, but I manage to DIY better on the next rims. In fact, I wreck this version and re-wrap it again using my latest technique.

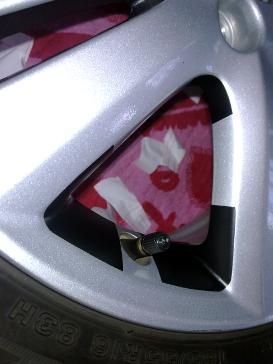
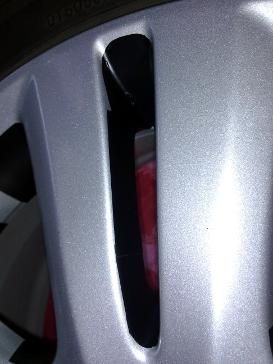
First, I must know how well the sticker will bend following the rim's curves. So I've learned enough by disposing one set of stickers for test trial. What I've learned is the sticker will be splitted if I force it to follow valley curve, even it preheated with hot gun. So I have to put more layers on those kind of areas. I also put another layer on narrow holes because the remaining 'flaps' won't cover the whole surfaces (right pic). Here we go:
After layering complete, I put a sheet sticker, large enough to cover the whole rim. Then I did the exact same things like the video in Youtube HERE, my initial inspiration. I think video speaks louder than words... Hehehe... Those guys are wrapping a descent rim so the sticker won't split much (but you'll see them plaster it here & there to wrap uncovered areas).