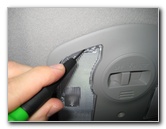
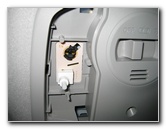
Insert the blade of the small flathead screwdriver in between the overhead console and the translucent plastic map light lens cover. To protect the plastic surfaces, you can place a thin cloth over the blade of the screwdriver.
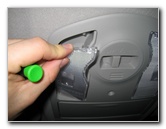
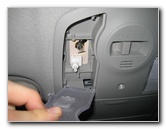
Gently pry out the lens cover and set it aside in a safe place. You may have to pry with the screwdriver at several locations around the lens cover. Only minimal force should be needed to pop out the lens cover.
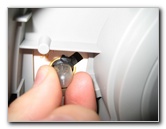
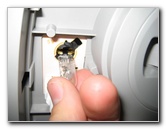
Grasp the old map light bulb with your thumb and forefinger before pulling it straight out of the socket.
Push a new # 168 light bulb straight into the map light bulb socket.
No comments:
Post a Comment