How To Replace 2014/15 Outside Mirror Shells On A 2014-15 Honda Accord
Replacing The Shell On A 2014-15 Honda Accord
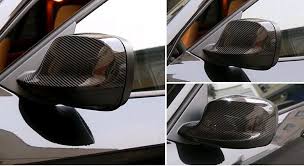
I had broken the front part of the shell on my new 2015 Accord passenger side mirror backing out of the garage. It may as well have been a side swipe or vandals, either way it needed to be repaired. Going to the dealer was out of the question due to cost.
First move the mirror glass all the way into the up position. Honda did not leave any room to work here, things are really tight. It’s also dark in there behind the mirror so it’s hard to see. I used a small piece of paint stirring stick to help lever the bottom corners of the mirror up so I could get a long small sized flat blade screw driver in behind the mirror.
What you need to do is, get the blade of the screw driver into the little slots and twist, the bottom of the glass should unlock allowing you to lift the mirror glass off.
There are two leads attached to the mirror for the defrost feature. DO NOT Pull the wires!! There is a small tab on the clip holding the wires onto the mirror. Just like any other electrical connector on a car. Push the little tab then while holding the bottom of the connector and mirror gently pull the wire off.
Now you can get to the tabs, clips and screws to disassemble the mirror. You will need the flat blade screw driver and a Torx screw driver.
To remove the front of the shell you’ll need to remove two Torx Screws on the right side and gently pry up on the 3 tabs along the top, and Unlock the main tabs holding the front shell on. One of the main tabs is seen to the left of the motor assembly and the other is at about the 4 o’clock position. These are difficult to unlatch, be sure to remove the screws first then undo the three tabs along the top before unlocking the main tabs.
Lift the front half of the shell up and off exposing the rest of the core with the motor attached. Disconnect the lane change camera lead. The motor is held in place by three Torx screws and two clips.
Remove the three Torx Screws, and gently pry the tabs to release the motor.
At this point there are three screws and a locking tab left to be able to remove the rear cover.
When you have the screws out and the locking tab unhooked, you can pull the rear half of the shell off. Unplug the wire harness from the turn signal assembly. The shell will have the turn signal piece mounted inside so you’ll need to pull two more screws to remove it.
This completes the dis-assembly of the mirror. You can now replace one or both shells or the camera or turn signal assembly. There is a small cover on the bottom . There is no need to remove this cover. You must have the mirror off the car to slide it out, DO NOT attempt to pry it off.
There is also a small trap door on the bottom of the front shell half, this also does not come off.
Now what you have as a pile of parts to work with plus your shell halves.
To reassemble, start by installing the turn signal light assembly. Align the locating pin into its hole and the assembly should slip down into the locators mounded into the shell.
At this time only install TWO screws!
Now you can attach the rear shell to the motor mount assembly. First, make the harness connection to the turn signal assembly.
Next you will need to align the locking clip to its hole in the motor base assembly.
At this time install two more screws only. One on the far left top and one at the bottom just below the motor mounting area next to the turn signal light assembly locating pin.
Now you can mount the motor assembly. There are two tabs and three screws that hold it on. The locking tabs are on the motor assembly.
Clip the motor assembly into the slots and secure with three screws.
This is all we can do with the rear shell right now. Go to your front shell, and install the camera with the two screws and secure the lead into the tabs along the edge.
Connect the cameras wire lead to the harness in the rear shell. Tuck the harness under the hooks molded into the rear shell.
Next mount the front half of the shell. Align the two large tabs with their respective holes in the main frame assembly.
Note the upper tabs are aligned with their small hooks inside the rear shell, and the two main locking hooks are aligned in their slots. Press the front half into the rear half making sure the two large locking tabs click and the three small tabs along the top lock into place.
Install the last two screws on the right side.
Almost done. Lay the mirror glass face down.
Carefully connect the two defrost wire leads until they snap into place.
Position the mirror over the motor and push it until it snaps on.
Replacing The Shell On A 2014-15 Honda Accord
I had broken the front part of the shell on my new 2015 Accord passenger side mirror backing out of the garage. It may as well have been a side swipe or vandals, either way it needed to be repaired. Going to the dealer was out of the question due to cost.
First move the mirror glass all the way into the up position. Honda did not leave any room to work here, things are really tight. It’s also dark in there behind the mirror so it’s hard to see. I used a small piece of paint stirring stick to help lever the bottom corners of the mirror up so I could get a long small sized flat blade screw driver in behind the mirror.
What you need to do is, get the blade of the screw driver into the little slots and twist, the bottom of the glass should unlock allowing you to lift the mirror glass off.
There are two leads attached to the mirror for the defrost feature. DO NOT Pull the wires!! There is a small tab on the clip holding the wires onto the mirror. Just like any other electrical connector on a car. Push the little tab then while holding the bottom of the connector and mirror gently pull the wire off.
Now you can get to the tabs, clips and screws to disassemble the mirror. You will need the flat blade screw driver and a Torx screw driver.
To remove the front of the shell you’ll need to remove two Torx Screws on the right side and gently pry up on the 3 tabs along the top, and Unlock the main tabs holding the front shell on. One of the main tabs is seen to the left of the motor assembly and the other is at about the 4 o’clock position. These are difficult to unlatch, be sure to remove the screws first then undo the three tabs along the top before unlocking the main tabs.
Lift the front half of the shell up and off exposing the rest of the core with the motor attached. Disconnect the lane change camera lead. The motor is held in place by three Torx screws and two clips.
Remove the three Torx Screws, and gently pry the tabs to release the motor.
At this point there are three screws and a locking tab left to be able to remove the rear cover.
When you have the screws out and the locking tab unhooked, you can pull the rear half of the shell off. Unplug the wire harness from the turn signal assembly. The shell will have the turn signal piece mounted inside so you’ll need to pull two more screws to remove it.
This completes the dis-assembly of the mirror. You can now replace one or both shells or the camera or turn signal assembly. There is a small cover on the bottom . There is no need to remove this cover. You must have the mirror off the car to slide it out, DO NOT attempt to pry it off.
There is also a small trap door on the bottom of the front shell half, this also does not come off.
Now what you have as a pile of parts to work with plus your shell halves.
To reassemble, start by installing the turn signal light assembly. Align the locating pin into its hole and the assembly should slip down into the locators mounded into the shell.
At this time only install TWO screws!
Now you can attach the rear shell to the motor mount assembly. First, make the harness connection to the turn signal assembly.
Next you will need to align the locking clip to its hole in the motor base assembly.
At this time install two more screws only. One on the far left top and one at the bottom just below the motor mounting area next to the turn signal light assembly locating pin.
Now you can mount the motor assembly. There are two tabs and three screws that hold it on. The locking tabs are on the motor assembly.
Clip the motor assembly into the slots and secure with three screws.
This is all we can do with the rear shell right now. Go to your front shell, and install the camera with the two screws and secure the lead into the tabs along the edge.
Connect the cameras wire lead to the harness in the rear shell. Tuck the harness under the hooks molded into the rear shell.
Next mount the front half of the shell. Align the two large tabs with their respective holes in the main frame assembly.
Note the upper tabs are aligned with their small hooks inside the rear shell, and the two main locking hooks are aligned in their slots. Press the front half into the rear half making sure the two large locking tabs click and the three small tabs along the top lock into place.
Install the last two screws on the right side.
Almost done. Lay the mirror glass face down.
Carefully connect the two defrost wire leads until they snap into place.
Position the mirror over the motor and push it until it snaps on.